
Using Docker on CasaOS
Create new container
First click [App Store], then click [Custom install] in the upper right corner
Fill in parameters
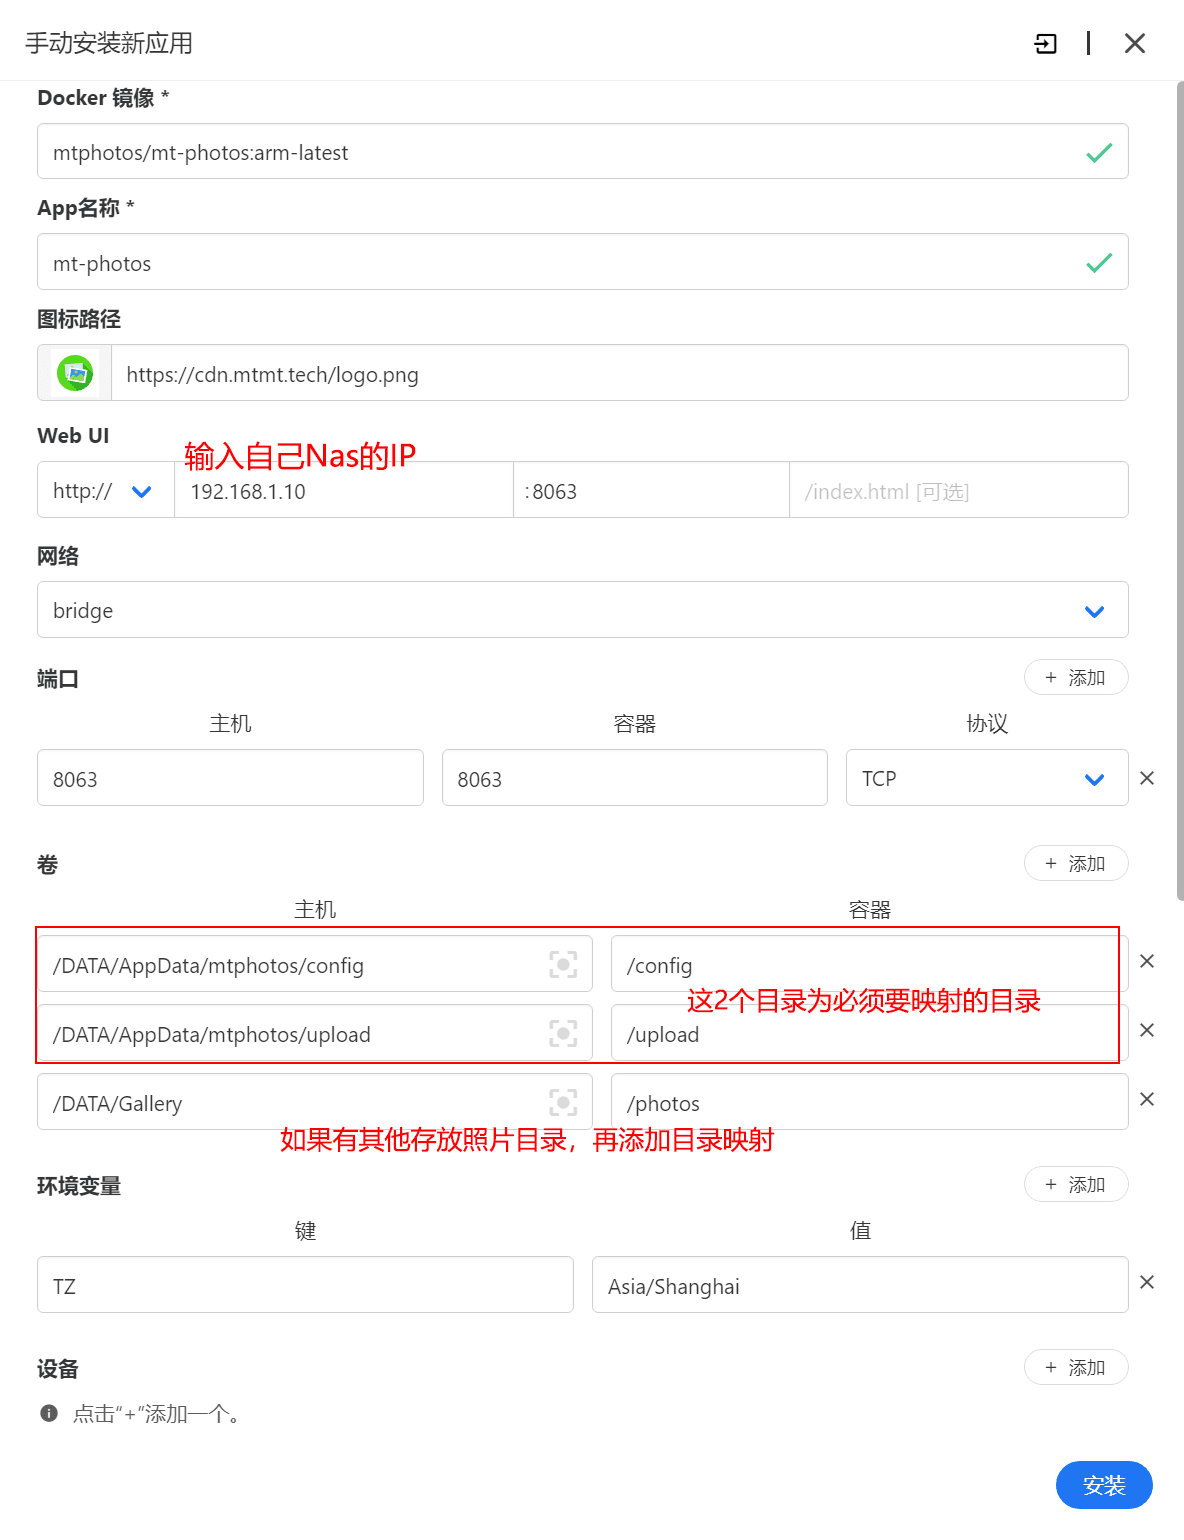
- Docker image (Docker image) fill in
mtphotos/mt-photos:latest, if it is an arm architecture, fill inmtphotos/mt-photos:arm-latest - App name (App name) fill in mt-photos
- Icon URL (icon path) input
https://cdn.mtmt.tech/logo.png - Web UI input NAS ip and port number 8063
- Click [+ Add] on the right side of Ports, and then enter 8063 for Host and Container
- Click [+ Add] on the right side of Volumes, and then add /config and /upload in sequence. /photos is the mapping of the existing photo directory, which can be added according to the actual situation
- Environment variables (environment variables) click [+ Add] on the right side, enter TZ = Asia/Shanghai
- Finally click [Install] at the bottom
Notice:
-
Data storage directory is mapped to the directory in docker** must be **
/config; -
Photo backup directory is mapped to the directory in docker** must be **
/upload; -
Existing photos and videos are mapped to the directory address name in docker, please do not have the same name as
system directory;List of
system directories: /bin, /boot, /dev, /etc, /home, /lib, /media, /mnt, /opt, /proc, /root, /run, /sbin, /srv, /sys , /tmp, /usr, /var, /lib64, /config
Access the web page
After waiting for the container to start successfully, use a browser to open the address: http://192.168.1.10:8063/ to access the installation wizard and start the initial configuration.
192.168.1.10is the IP of the NAS,8063is the mapped port number, please replace it according to the actual situation
